Donations Table - Update existing donation records
Data Import - Update existing donation records
There are two methods for updating existing donation records:
- Method 1: Bulk Edit from the Donations Table
- Update multiple records with the same value (e.g., assigning the same company or status).
- Method 2: Bulk Update via CSV Import
- Update multiple records with different values (e.g., unique statuses, company names, timestamps).
Both options help ensure your matching gift records remain organized and up to date.
Donations Table - Update existing donation records
To update records directly in the Donations table:
-
Go to Donations.
-
Select the checkboxes for the records you want to update.
-
Click Edit.
-
Enter the new value(s).
-
Select Update.
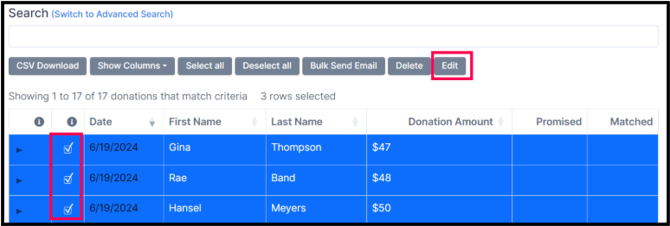
The following fields can be updated:
- Company
- Status
- Campaign
- Matched Amount
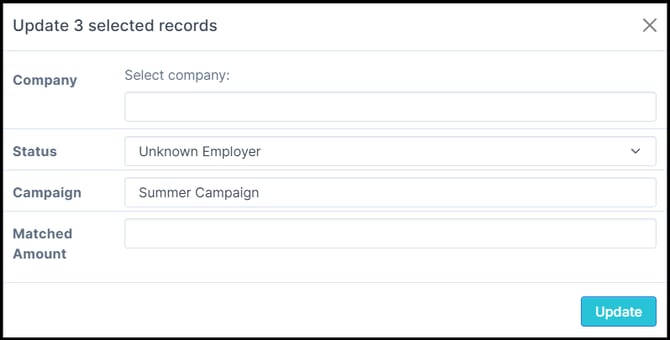
Enter a value for the field(s) you'd like to update and select Update.
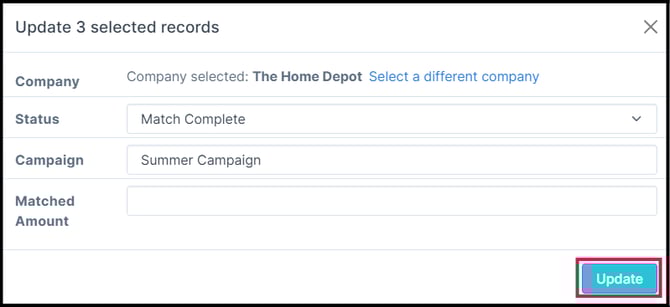
The updates will then be reflected in the Donations table.
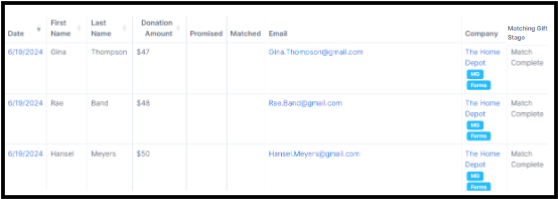
Updating the company name will not automatically update the donor's status or trigger emails to be sent to the donors. The donor statuses will also need to be manually updated and the emails will need to be manually sent. View this article to learn how to send manual outreach.
Data Import - Update existing donation records
Use CSV import when you need to update different values across records.
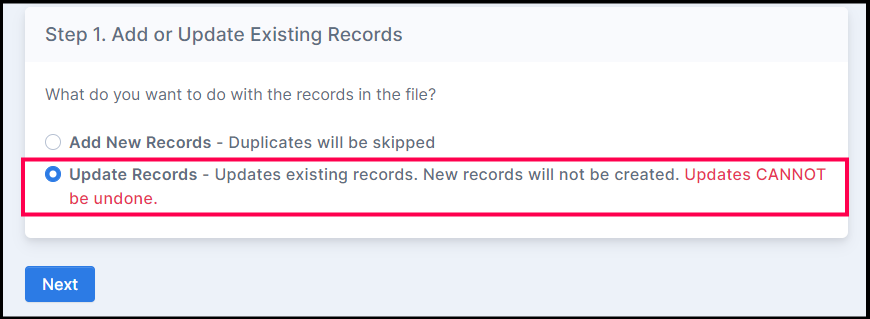
How to Begin:
-
Go to Data Import/Export → Data Import.
-
Choose Update Records (shown in red box on page 5).
-
Upload your CSV file.
To learn more about donor statuses, view this article.
Sample CSV File
Your CSV must include all required columns, even if the value for a field is blank for some records.
Required Columns:
-
Campaign
-
Identifier
-
Amount
-
Email
-
Phone
-
First Name
-
Last Name
-
Company Name
-
Timestamp
-
Status

- Campaign name
- Phone number
- Donor's first name
- Donor's last name
- Company name
- Donation amount
- Status
- Donation date (timestamp)
Statuses can only be updated forward, following the donor journey path:
Employer Identification in Progress → Closed → Waiting for Donor → Match Initiated → Pending Payment → Match Complete
Not Allowed:
You cannot move a donor backward in the journey via CSV import.
Example: Match Initiated → Closed is not allowed.
The field that can't be updated through the CSV import feature and must remain the same in the file:
-
Donation identifier
- Donor email address
Field Mapping
Once you've imported your CSV file full of donation records, you have the option of mapping the matching module fields with your CSV file fields.
If your CSV headers match the Double the Donation field names exactly, click Next to bypass mapping.
However, if you did not follow the same field names with your CSV file, as it is shown in the sample CSV File. You have to map the matching module fields with the fields in your CSV file. Below is a screenshot of the field mapping:
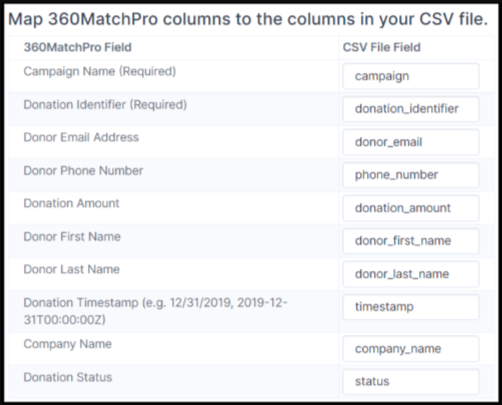
Click "Next" to move on to the next page.
Mapping Companies
Double the Donation attempts to match company names in your CSV to companies in our database, displaying:
-
DTD Best Guess
-
Count Score
-
Keep? checkbox
You can choose to keep or replace each mapping.

Once mapping is complete, click Import Data.
It is important to keep in mind that you can't undo an updated donation record. Once you upload a CSV import of updated records, that action can't be reversed. The only option would be to update a new CSV file with the change you'd like to make.
![]()
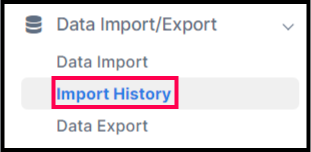
Import History
A new screen will direct you to your CSV Import History and will show you the following information:
1) The name of your CSV File
2) The date the file was uploaded
3) The Import Summary that includes donation records updated successfully failed to be updated, and duplicates.
![]()
Training Video