Getting Started: Billing Overview
This article provides an overview of the billing information in your Double the Donation account and how to update your information on file.
How to email an invoice to your organization
Training Video: Billing Overview
Managing Your Billing Information
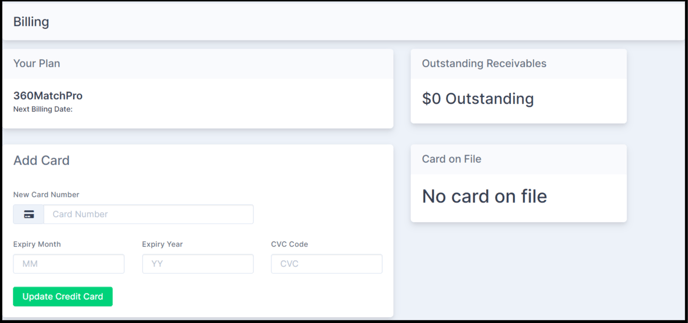
You can find all billing details for your Double the Donation account in the Billing tab. This section allows you to review your organization's billing plan and update your payment information.
Key Billing Information:
-
Your Plan: View the name of your Double the Donation plan.
-
Next Billing Date: Find the date of your next scheduled billing.
-
Outstanding Receivables: Check for any outstanding balance or charges.

Adding a Credit Card on File
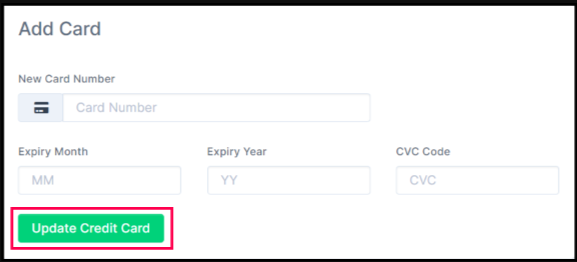
If you’d like your card to be automatically charged for your Double the Donation account on a monthly or annual basis, you can add a card on file.
How to Add a Card:
-
Enter the Card Information:
-
First and Last Name (as it appears on the card)
-
Credit Card Number
-
Expiration Month and Year
-
CVV
-
-
Automatic Charges:
Once the card is added, your account will be charged automatically, preventing any disruption in services. -
Pay Outstanding Balance:
After adding your card, you can use the Pay Balance button to settle any outstanding balance directly from your account.

Emailing an Invoice
To email any outstanding invoices for payment by check, simply use the link found in the Invoices section at the bottom of the billing page.
How to Email an Invoice:
-
Locate the Invoices section in the billing tab.
-
Click the Email Me Invoice button to send the invoice to your organization.

Adding Billing Contacts
You can add additional email addresses to receive billing notifications and invoices. We recommend adding your finance team’s main inbox (e.g., finance@yourorganization.org) to ensure uninterrupted delivery of billing notifications.
How to Add Contacts:
-
Enter email addresses directly in the Billing User Emails section.
-
Users marked as receiving Billing Emails in the User Management tab will also receive notifications.
Removing Billing Contacts
To remove a billing contact from your account, follow these steps:
-
Click on the Contact Record you want to remove.
-
Select Remove Contact from the options.
How to Remove Multiple Contacts:
-
Press and hold the CTRL button.
-
Select all the records you wish to remove.
-
Click Remove Contact to complete the action.
Additional Resources
Training Video: Billing Overview


