When to Use a Custom Matching Gift Program
Adding a Custom Matching Gift Program
Enabling Auto-Submission for Custom Programs
Viewing, Editing, or Deleting Programs
Alternatives to Deleting a Program
Encouraging Companies to Create Custom Programs
This feature is currently only available for nonprofits using Double the Donation Matching Enterprise or Standard Plans.
Some companies create a unique matching gift program exclusively for a single nonprofit. These “one-off” programs can be an incredible source of additional revenue and engagement — but they must be managed directly in your Double the Donation account since they do not belong in the main corporate matching gift database.
When to Use a Custom Matching Gift Program
Use a Custom Program When:
-
A company agrees to match gifts exclusively for your nonprofit.
-
If the program matches gifts to multiple nonprofits, submit the program for inclusion in the main Double the Donation database instead. Submit a new company program here.
Adding a Custom Matching Gift Program
Follow these steps to add a custom matching gift program:
-
Go to Settings > Manage Programs.
-
Click Add Program.
-
Complete the form fields, ensuring correct spelling and details.
-
The information entered here is shown to donors exactly as written.
-
If program guidelines/forms are in PDF format, email them to data@doublethedonation.com to be uploaded.
-
-
Click Save Program.
-
Use the View Program feature to confirm your entry looks correct. You can also preview the donor view by searching for the company name on your dedicated matching gift page.
Enabling Auto-Submission for Custom Programs
Auto-submission allows donor requests to be submitted automatically. When enabled:
-
Donation records update to Match Initiated – Donor Verified.
-
An email with submission details is sent to the company contact (unless you select No under "Email matching gift form to company contact").
-
The donor receives a confirmation receipt.
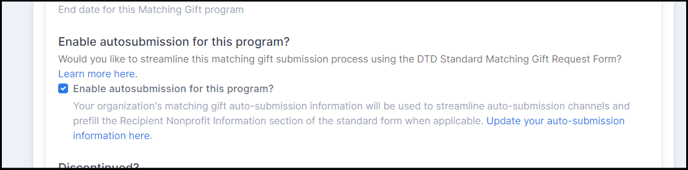
Before enabling, ensure your organization profile is up-to-date. How to update your organization profile.
Viewing, Editing, or Deleting Programs
View a Program
-
Go to Settings > Manage Programs.
-
Select View Program Details to preview exactly how donors will see the program.

Edit a Program
-
Go to Settings > Manage Programs.
-
Click Modify Program, make changes, and save.
-
Updates are live immediately.

Delete a Program
-
Go to Settings > Manage Programs.
-
Select Delete Program.

Note: Deleting removes the company name from all associated donation records, resetting them to Employer Identification in Progress.
Alternatives to Deleting a Program
Instead of deleting, you can:
-
Mark the program as Discontinued using the Program Status field.
-
Add start and end dates to reflect the program's duration.
Both options preserve historical data while ensuring accurate information is shown to donors.
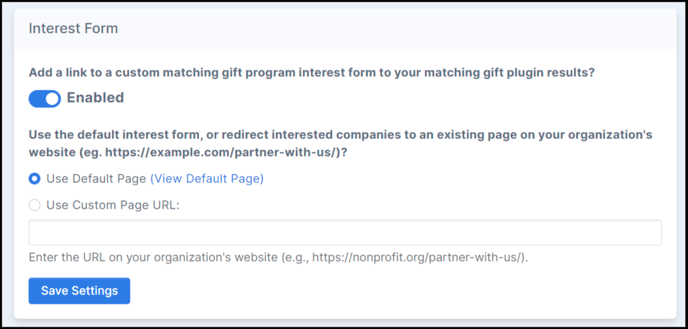
Encouraging Companies to Create Custom Programs
To make it easy for companies to create custom programs for your organization:
-
Go to Settings > Manage Programs > Interest Form.
-
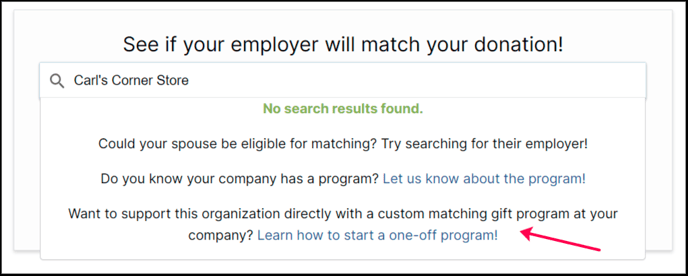
Enable the toggle to display a link in your plugin’s "No search results found" message.
-
Choose one of the following:
-
Use the Double the Donation default interest form (automatically provided and branded).
-
Use your own custom interest page.
-
Using an interest form helps capture potential corporate partners interested in supporting your nonprofit.
Tip: If creating a custom page, download our resource "How to Create an Optimized, Personalized Interest Page" to get started. Navigate to "Settings" --> "Manage Programs" and scroll to the bottom of the page to download this PDF and other resources.
FAQs
Q: Why doesn’t my one-off program appear in the donation form’s search tool?
A: In some partner integrations, the donation form’s search tool is not tied to your account unless the API key is implemented. Check if the API key is present by viewing the page source for “DDCONF.”
Q: Can donors still manually submit a match if auto-submission is disabled?
A: Yes, donors will still see the program details and can follow instructions for manual submission.
Q: Should I delete a program after it ends?
A: Not necessarily. Use the Discontinued status or enter an end date to preserve historical donor associations.
Q: Can multiple custom programs exist in my account?
A: Yes, you can manage multiple unique company programs simultaneously, each only visible to your donors.
By properly managing custom (one-off) matching gift programs, your nonprofit can strengthen corporate partnerships, streamline donor communication, and capture more matching gift revenue.