Ways Donation Records Are Added to the Blocklist
Ways Donation Records Are Added to the Blocklist
Donation records can be blocklisted automatically or manually.
1. Donor-initiated actions
-
Not eligible for matching gifts (temporary):
-
If a donor clicks "My donation is not eligible" in an email, their address is blocklisted for 180 days. View this article to learn more.
-
-
Retired donors (permanent):
-
If a donor indicates they are retired, their address is permanently blocklisted.
-
-
Unsubscribes (permanent):
-
If a donor clicks the unsubscribe link in an email, their address is permanently blocklisted.
-
2. System-initiated actions
-
Bounces (permanent): If an email hard bounces, the address is automatically blocklisted.
-
Spam reports (permanent): If a donor marks an email as spam, their address is permanently blocklisted.
-
CRM integrations (permanent): If donation records are flagged as “Do not email” in your CRM, they are automatically blocklisted when synced.
3. Manual actions
-
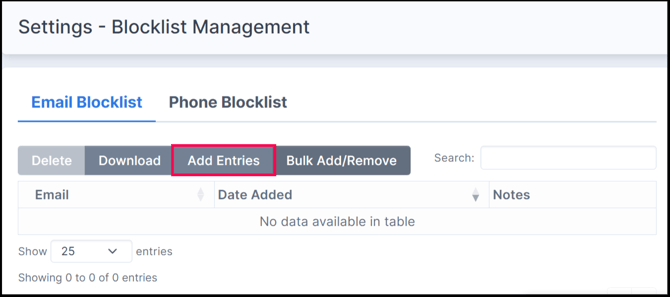
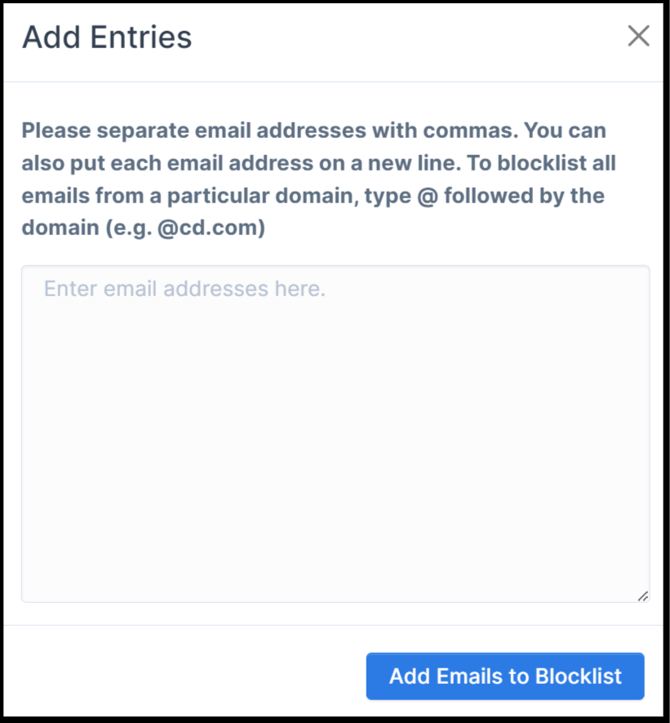
Manually added: You can add specific emails or phone numbers via Settings → Blocklist Management → Add Entries.
- You can add multiple email addresses at a time by adding a comma in between each email address or putting each email address on a new line.
- You can add emails from a particular domain by using the @ followed by the domain. This is useful for any corporate givers or foundations that you'd like to permanently add to the blocklist so they don't receive blocklist emails.
-
Bulk upload: Import up to 6,000 records at once via CSV under Blocklist Management → Bulk Add/Remove. Larger files must be split into smaller batches.
- Once your CSV is formatted according to the sample file, click the Choose File button to preview the records. If the records are ready to be imported, click Add to Blocklist to import the records you would like blocklisted.
- Once imported, your newly added records will appear on the Email or Phone Blocklist. Their note will auto-populate to read “Blocklisted via CSV import”.
- For an FAQ on the Blocklist, view this page.


